Boundaries
Boundaries provide us with the ability to digitize interfaces between different types of facies, formations etc. These are, naturally, digitized and maintained in 3D coordinate space.
To add a new boundary, right click on the “Boundaries” node and select “Add new…”. Rename the boundary as appropriate.
Icons will appear at the top of the screen.
![]()
1 2 3 4 5 6
These control how the boundary is digitized as follows –
1.
Add one ore more points. Simply click on any
point on the outcrop, lines will join each point digitized. Click on the tick(6) icon to complete the boundary or hit Escape on the
keyboard. OpenOutcrop has been designed so that
clicking in the middle of two existing points will insert a new one between the
two.
2.
Move one or more points. Simply click and drag.
3.
Delete one or more points. Click close to any
point to delete it.
4.
Undo (the previous operation).
5.
Redo (the previous operation).
6. OK, I’m finished with the current operation.
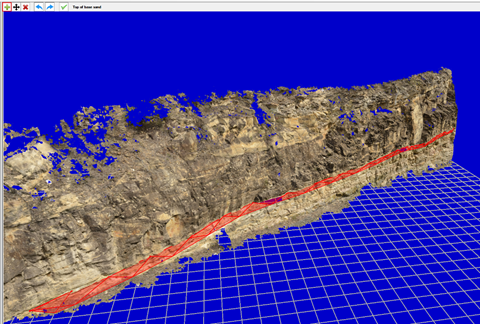
Once you have digitized the boundary (or while you are digitizing), it will be displayed with a projected (horizontal plane) as in the following –
Additional boundaries can be digitized by right clicking the “Boundaries” node and clicking on “Add new …” again.
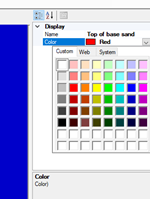
The color of the boundary can be changed at any time by selecting a new color in the properties window at the top right hand corner of the screen.
And will result in the boundary being re-displayed –
