Geobodies
Digitizing the outline of
identified geobodies is like that of boundaries except we are digiting a
polygon instead of a boundary. All digitized geobody points are maintained in
3D (world) coordinate space.
To add a new geobody, right click
on the “Geobodies” node and select “Add new…”. Rename the geobody as
appropriate.
Icons will appear at the top
of the screen.
![]()
1
2 3 4 5
6
These control how the
boundary is digitized as follows –
1.
Add one or more
points. Simply click on any point on the outcrop, lines will join each point
digitized. Click on the tick (6) icon to complete the boundary or hit Escape on
the keyboard. OpenOutcrop has been designed so that clicking in the middle of
two existing points will insert a new one between the two (after the initial
outline has been created).
2.
Move one or more
points. Simply click and drag.
3.
Delete one or
more points. Click close to any point to delete it.
4.
Undo (the previous operation).
5.
Redo (the previous operation).
6. OK, I am finished with the current operation.
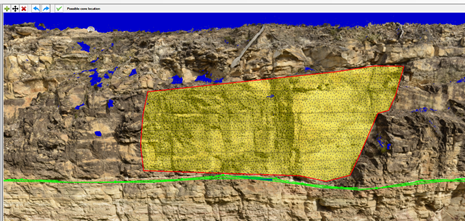
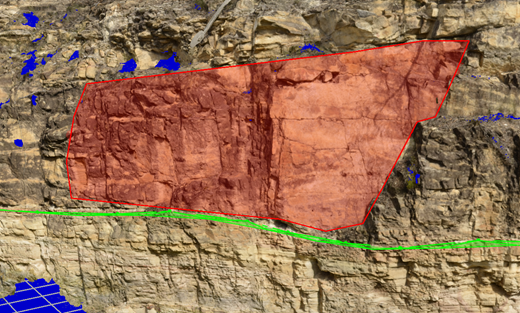
The following shows a
completed geobody shaded in red. Note that the shading is “draped” over the
outcrop.
Alternatively, geobodies may
be shaded with lithological patterns. To select a pattern, click on the
“Pattern” property of the geobody. This will result in the following dialog.
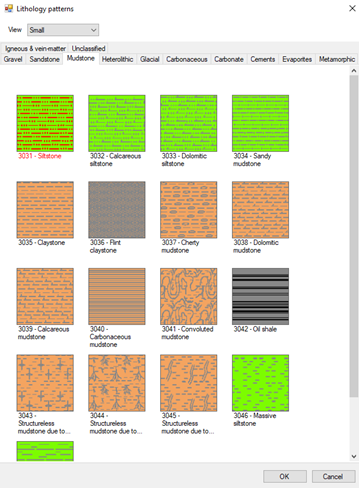
Click on the appropriate
pattern and click “OK”. To display the pattern on the geobody, make sure that
the “Fill type” property is set to “Pattern”.
You can experiment with the
“Pattern size” and “Transparency” properties to give a desired effect.